
ဝုတ် သို့မဟုတ် woof

Ko Ko Ye
Founder
1 min read
ကျွန်တော်တို့ တစ်ဦးနဲ့ တစ်ဦး ဖိုင်တွေ ရှဲရှာမှာ နည်းလမ်းမျိုးစုံရှိပါတယ်။
SAMBA နဲ့ မျှမယ် USB နဲ့ ပေးမယ် Nitro Share နဲ့ ပို့မယ်။ အစုံပါပဲ။ တချို့ ရုံးကြီးတွေမှာတော့ NAS သုံးကြတယ် FTP သုံးကြတယ် ကိုယ်ပိုင် Local Cloud တွေ သုံးကြတယ်။
ဒါပေမယ့် တခါတလေမှ တွေ့ကြတဲ့သူတွေကတော့ SMB လဲမသုံး တခြား Services လဲမသုံးကြဘူး။ အဲအချိန်မှာ SimpleHTTPServer နဲ့ Share ဖို့ နည်းလမ်း ရေးပေးပြီးသွားပါပြီ။ ဒါပေမယ့် အဲတာက Folder လိုက်ကို Read Access ပေး ရယူခွင့်ပေးလိုက်သလိုဖြစ်နေတယ်။
ကိုယ်ပေးချင်တဲ့ ဖိုင်လေးတွေကိုပဲ ပေးချင်တဲ့အခါမှာ ဘယ်လိုလုပ်မလဲ
1- woof ကို သွင်းပါ။ sudo apt-get install woof
2- woof ကို configuration လုပ်ပါ။
အသုံးပြုပုံက ဒီလိုလေးပါ။ ဒါပေမယ့် ဒီ့ထက်လွယ်အောင် လုပ်လို့ရပါတယ်။
woof [-i <ip_addr>] [-p
woof [-i <ip_addr>] [-p
woof [-i <ip_addr>] [-p
woof [-i <ip_addr>] [-p
-z = gzip , -j = bzip2 , -Z = zip, -u = No Compress
-s = specified instead of a filename
-U is specified, woof provides an upload form and allows uploading file
defaults: count = 2, port = 8000
နမူနာ တစ်ခု ဒီလိုပြပါမယ်။
woof -i 192.168.0.100 -p 8080 -c 2 music.zip
ဒါဆိုရင် Browser ကနေ http://192.168.0.100:8080/ ဆိုပြီး ရိုက်လိုက်ရင် music.zip ဖိုင်ကို ရယူနိုင်ပါလိမ့်မယ်။ ရယူနိုင်မယ့် အကြိမ်အရေအတွက်ကို -c 2 နဲ့ နှစ်ကြိမ်လို့ သတ်မှတ်ပေးထားပါတယ်။
အဲတာမျိုးတွေ ထည့်မရိုက်ချင်ရင် တခါတည်း config ဖိုင်ကို ရေးထားနိုင်ပါတယ်။
Terminal ကိုခေါ်လိုက်ပါ။ Ctrl+Alt+T
file name = ~/.woofrc
အဲဒီဖိုင်ကို Gedit နဲ့ပဲဖြစ်ဖြစ် ပြင်ပါမယ်။
gedit ~/.woofrc
အောက်ပါ အတိုင်းဖြည့်ပါ။
[main]
port = 8008
count = 2
ip = 127.0.0.1
compressed = gz
ပိုလွယ်စေချင်ရင် port ကို 80 ထားပြီး IP ကို ကိုယ့် IP ရှာပြီး ဖြည့်သွင်းပေးပါ။ Count ကို ၂ ခါပဲ ထားထားပါတယ်။ မျှဝေချင်တဲ့လူဦးရေပေါ်မူတည်ပြီး Count ကို ပြောင်းလဲပေးပါ။
ပြီးရင်တော့ Terminal ကနေ woof ဆိုတဲ့ Command နောက်မှာ မိမိ မျှဝေချင်တဲ့ ဖိုင်နာမည်ရိုက်ထည့်ရုံပါပဲ။
More in Guide

Git multi account
Developer အတော်များများဟာ Email တခုနဲ့ ssh key ၂ ခု ၃ ခုလောက်ထပ် ပိုသုံးကြလေ့ မရှိပါဘူး။ Personal Development နဲ့ Contract Project တွေ Freelance Project တွေမှာ အကောင့်တခု အီးမေးလ်…
 Ko Ko Ye
4 min read

Explaining Linux Special Permission(SGID,SUID,Sticky bit)
Explaing Special Linux Permission (SUID,SGID ,Sticky Bit) အခုပြောမယ့်အကြောင်းအရာကတော့ special linux permission တွေ ဖြစ်တဲ့ suid, sgid နှင့် sticky bitတို့ ပဲ ဖြစ်ပါတယ် ။ အဲတာတွေ…
 Yeh Bone Myat
4 min read
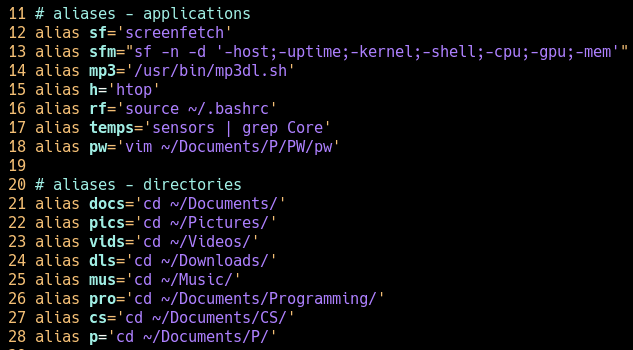
Alias On Ubuntu
Ubuntu users တွေအတွက် Terminal သုံးတဲ့အခါမှာ အချိန် ကုန်သက်သာစေမယ့် နည်းလမ်းကောင်းတစ်ခုပေးချင်ပါတယ်။ terminal မှာ alias သုံးနည်းလေးဘဲဖြစ်ပါတယ်။ ကိုယ် ရေးနေကြ command အရှည်ကြီးတွေ…
Ko Ko Ye1 min read